Almost Done

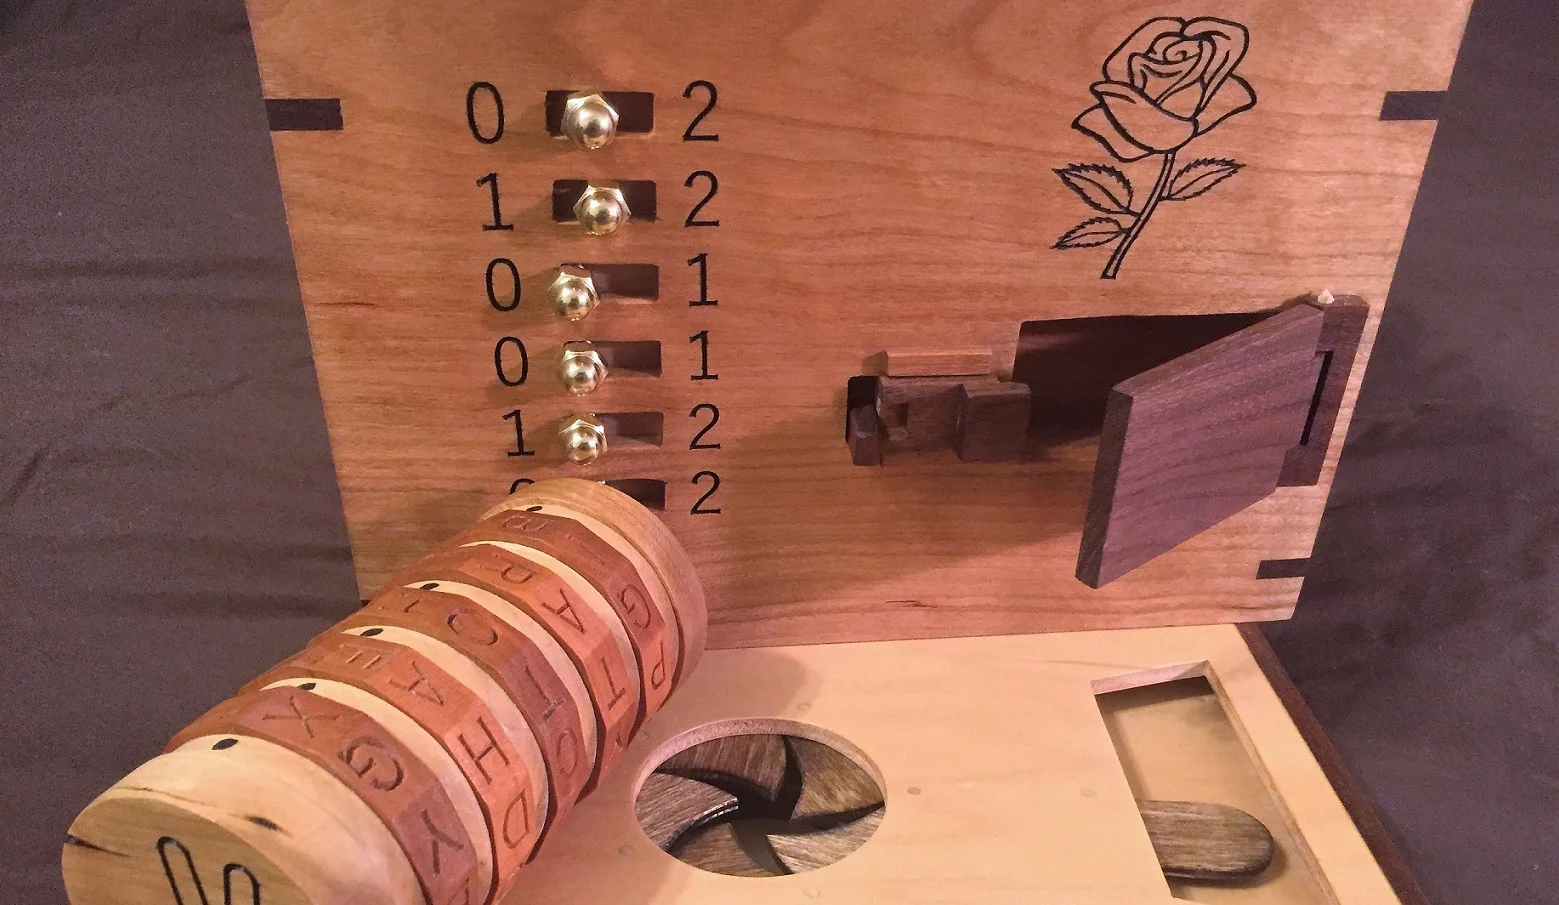
Amidst all my shop clean up work I also have a set of puzzles boxes I need to finish up.  I'm at that point where there are only a few things left to do.  These puzzle boxes are my current flagship product so I've put in a lot of effort to make sure I get them right.

puzzle boxes with pulls.jpg

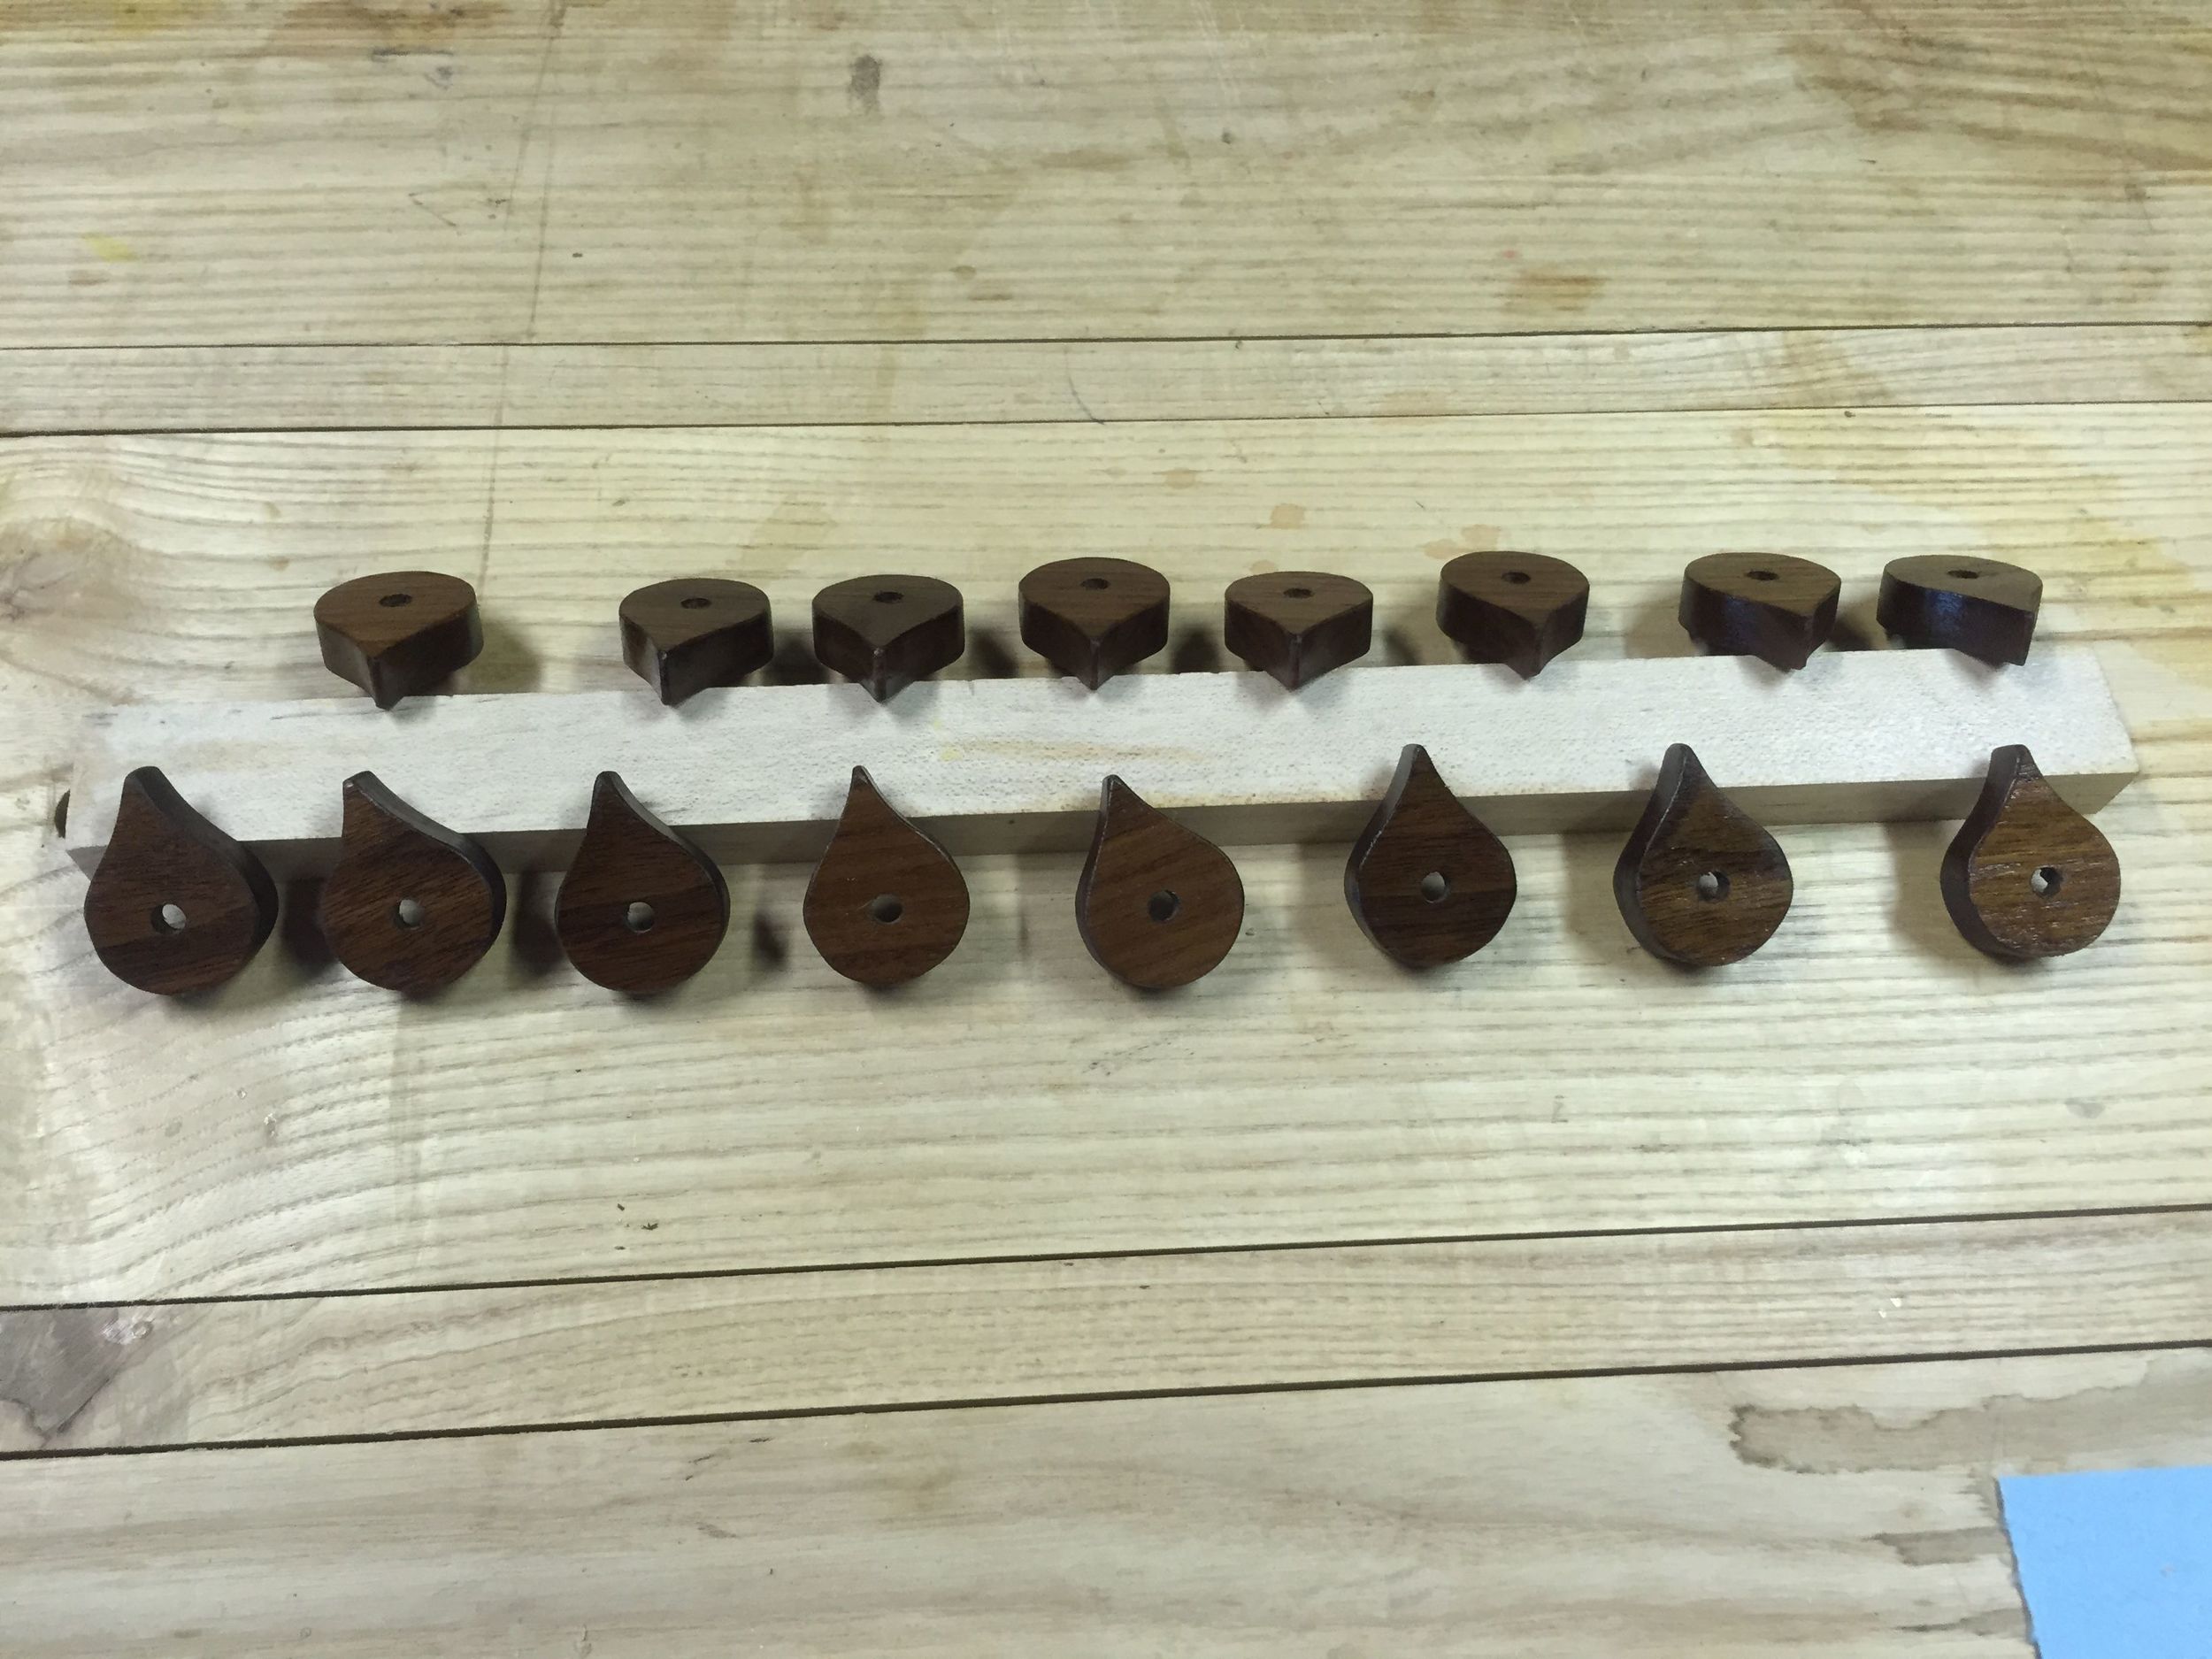
This mornings job was to put on the pulls.  I found some nice ones that I liked the look of and they fit the boxes well.  The locks aren't in place yet, though.  I like to have the pulls on so that opening the drawers is easier when I do the final fitting of the locks.

My typical method for putting on pulls ... it's pretty simple.  I put some tape across the drawer front and mark the center with a soft tip pen.  The soft tip keeps from putting indentations on the drawer front (and yeah, a pencil can leave marks).  Then I clamp a small block to the inside of the drawer and drill the hole for the machine screw. The block keeps the wood from chipping out inside the drawer.  Then just take the clamp and tape off, put the pull on and you are good to go.  If by some chance you marked the hole off center just tell everyone that was by design!

Next up is fitting the locks, then hinges.  You can see how these puzzle boxes are shaping up, they do look nice!

Organizing the Organizers

I spent a week away for work (training down in Ga, yay - got to see all my colleagues and have some fun at night!) which certainly cut into my shop time.  If I can't get in the shop (because I'm several states away) then it's kinda hard to work.  Fortunately, I'm home again and I can get back to work.

I seem to suddenly have many projects going at once.  We were out in town and I had the chance to pick up a sheet of plywood which meant my next job was the shelving unit for the small parts holders.

This went together fairly fast, just two weekend afternoons (with appropriate breaks and random bouts of walking around plus listening to podcasts).  It's just a  3/4" birch ply shell with 3/16" shelves.  The shelves seemed a bit thin but I don't see any problems.  I left room for 2 more small cases and 3 more large ones.  I made the case to slide into an existing cart.  I made the fit tighter than I wanted so a little "encouragement" was needed to slide it into place.  I won't say it's perfect (by any stretch) but it uses existing space, is better than what I had and has room for expansion.  When it comes to shop furniture, perfection isn't usually necessary.

I have most of the cases full and I still have some random containers of things.  I'm already liking having my little bits of things sorted.  I've even found a lot of items I didn't know I had.  I'll need to get a labeler at some point and put labels on the handles for easier searching.  However, some containers will likely be a bit random.  I'm not too insistent on organizing every last piece and I will have some containers with a bin of "random sized machine screws" just because it's not worth sorting them when I might have one of several sizes.  Sort the important stuff (wood screws!) and at least keep the rest contained and find-able.

There's still a tool rack to finish.  I have to order the shorter rails for the table saw.  I have 4 puzzle boxes near completion (i.e. sell-able!) and another 4 linkage hinge boxes almost ready to finish.  Then there's whatever is next!  Hopefully some more videos to come over on my Youtube channel as well ( https://www.youtube.com/channel/UCOnWOiDfGR8KpReI8VIIEbQ )

Need a Tool Rack? Just Add Wood

Really, that's all you have to do.  Once you start to have some lumber stacked up and a pile of tools at your disposal plus an even partial level of knowledge in how to use it all, things get easy.  Well, easier.  I've had 3-4 different places that my general hand tools are kept.  This is everything from chisels to awls, squares, rulers, dividers, screw drivers, etc.  I'd been wanting to do something about that.

Not long ago I watched a video series on 5S is the shop.  It was about how to apply the 5S methodology first developed in the automotive industry to your own shop. Some primary tenets of the method are that your things are organized, most commonly used tools are the closest and items are always put away clean and ready for the next use. I knew that having one, good, solid place to keep my tools was necessary.  

Thinking about this is when I realized my tools were a mess and jumbled because I had no good place to always keep them.  It should be much easier to always replace a tool when doing so means little more than turning slightly.  This tool rack will hang near my bench, probably almost within arms reach.  My hope is to never leave the bench covered with tools.  The evenings I've put away my tools and swept off the bench really did make it easier to get back to work the next day.  Everything was just ready to go.

Now, can I go the next step to clean and sharpen every tool before it's put away?

This tool rack is currently quite a bit bigger than I need.  The slot for storing the tools is about 48".  The top is 52" long and 10" deep.  I will add pegs to the front and quite likely a row of small dowels along the bottom (great for small items!).  I made the gap for the tools a bit over 9/16" which fits a variety of my tools.  A few can fall this gap, but I knew that.  This is all oak - it was bits and pieces I've had around for way too long.  The top has a hole part way through and a big blue stain (when metal is driven in live oak, that's what happens) so I figured it's work fine here.  Coming up, I need to make some additions so we know this belongs to Cryptic Woodworks!

Early Morning Glue Up

Having a full time job again means getting more creative in how and when I get work done.  Sometimes that means doing work in the morning to leave me prepped for the evening.  The morning is a good time to do a glue up so I'll have those pieces ready to come out of the clamps.  I'll also do some finishing last thing in the evening so parts can sit and dry overnight (a time when I'm not making any more dust!)

As part of my workshop organization I realized I need a tool rack to handle all the different places I currently have my most common used stored.  So, I didn't want to re-invent the wheel for this and I pulled up a design that looked nice from Popular Woodworking (http://www.popularwoodworking.com/projects/i-can-do-that-tool-rack) .  It looks plenty big enough to handle a lot of tools.

I'm not using pine for mine as I had quite a bit of oak laying out in the lumber shed that needed to get used.  It's older stuff that had some defects that I kept shuffling around.  I don't care if there are some knots or a minor check in this.  Or even a big metal stain from where a bolt must have been driven into the tree.  I just needed to glue up a few boards to get the widths I needed. 

Once I did in I'll look for a way to Cryptic this up a bit.  Stay tuned for what I come with on that.

Crawling to the Finish Line

Been busy both at home at and work, plus all the workshop re-organization has gotten in the way of cleaning.  But, some things have to keep moving.  The dials for the puzzle boxes are getting their finish coats so that I'll hopefully be able to fully wrap them up soon.  These are walnut, finished with Danish Oil and now they are getting their wiped on coats of gloss poly.  It's been really humid around here which means finishes can take days instead of hours to dry.  

The re-organization is moving along and hopefully I can post some updates and builds that will happen as a result of that.

Guess it'll be a short post today.

Making a Big Mess (and trying to clean it up)

Like so many people, I have too much stuff and too small of a shop.  That means I trip over myself when I try to work.  Over the weekend I wanted to do some re-arranging to fix a few things I really didn't like.

First, I continued the job to get all my small parts and things into one place.  It's really coming along.  I'm at the point I need to make a cabinet to hold all the containers.  I know, it sound weird, make something to hold the holders.  I really like these organizers, though.  I plan to make a cabinet to hold several more than I have right now to allow room for expansion.

My next goal was to move the workbench.  I have always worked with the bench against the wall.  But I want to do some more video work and having the bench against the wall makes that tricky.  It's seems nicer if  you can have a camera across the bench aimed at you.  Plus, I often have unused areas of the bench - and in a small shop you better use ever inch you have.  So, I have the bench out in the open and I can now work all the way around it.  So far, I'm really liking it.  It does mean cleaning off the junk since I may want to use any area.

Along with moving the bench meant some tool organization on the wall behind it.  Things are still a jumble there but I want to make a proper tool cabinet and some racks for all my regularly used items.  Being at the bench and just needing a slight turn to grab a chisel is really nice, plus it's easy to always put things back.

Several other tools moved around.  I don't like where the planer is, but I'm out of options at the moment.  I'm trying to buy the shorter rail set for the table saw.  Currently I have the 60" rails and they are just too big.  I can't orient the saw like I want.  If I can get the shorter rails, I'll swap those on, put the long rails in storage (in case I move to a bigger shop) and then I'll get some much needed room back.

Finally, I should begin looking at a new dust collector.  I have an older Jet with a garbage can pre-separator.  That garbage can causes a huge loss in suction and takes up a lot of space.  Since the shop is small I don't want an in place collector, but I would like a rolling cyclone system with the collection can right under it.  That would reclaim some space and give me a more powerful system.

Hopefully I can get back to actual woodworking soon, and not just cleaning & organizing!

It's Not All Glitz and Glam

Sometimes the job is just to fix the wheelbarrow.  Usually because you need to the wheelbarrow to do some other job.

Something I like about woodworking is that you end up learning to do all kinds of things.  Stuff that might have seemed hard or impossible is now pretty easy.  The broken wheelbarrow started out just needing a new wheel.  That turned out tougher than you might expect.  Of course, the same exact wheel isn't available anymore.  And the new wheel has a different type of hub which means the spaces don't fit.  So, I got the wheel home, saw how big of a spacer I actually needed - discovered that no such thing exists and got out the hack saw.  A woodworking bench holds a metal part just fine for the occasional cut.  In 10 minutes I had properly sized spacers and the wheel was back on.

Then came this ramped spacer that sits between the body of the wheelbarrow and frame.

Back to woodworking, at last!  The old one had broken, warped and wasn't working too well anymore.  I found some scrap red oak that looked about right, quickly milled it up and then copied the design of the old one.  There was a surprising bit of complexity in this little job.  The long taper was easily cut on the bandaw and is good practice for free handing a straight line.  The notches have angled edges which a good table saw sled/miter gauge handle easily (for a tip, once the two sides are laid out, just line those up with the blade kerf in the sled , set the fence and you are good to go.).  Finally, the two holes, which, like me, you may reailize later have to be perpendicular to the original straight edge - well, if you saved the offcut it's easy enough to set this back on top of and everything will go fine.

Woodworking includes a lot of problem solving.  And that's what makes it really fun.  Stuff that might have been hard at one time suddenly seems trivial.  And when the earlier stuff seems so simple, it means you are really moving along.

So, I didn't get a new puzzle box out of this, but I can get some yard/farm work done!

A Thousand Little Things

Ii figured it was time I started to put some much needed organization in place.  Cryptic Woodworks is a one man shop in a one car garage - space is always at a huge premium.  Over the years I've collected far too many little bits.  Funny thing is, I never know what I have.

I currently use a combination of those plastic bins in a holder that you hang on the wall, some open bins sitting on things, old cool whip containers, random small metal tins (probably tuna fish at one time), miscellaneous piles of bits and who knows what else.  I originally thought I would engineer super mice to straighten up the shop, but that had some unintended consequences.  

Fortunately, along came the internet and this little video from Adam Savage (of Mythbusters) https://youtu.be/1OPSbF6kM9k about how to organize lots of small parts.  This looked like a great idea.  So off I went to find some organizers.  The product he uses is quite expensive and a bit much for my budget, but I found some adequate items from Stanley at both big box stores and Amazon.

With 7 of the organizers in hand I headed into the shop.  I'm part way done and already liking how it looks and how easy it is to see what I have.  I'll likely end up with individual oganizers for wood screws, nuts/washers, bolts/lags, other connectors (threaded inserts, etc) and who knows what else.

Once organized I'll put together a cabinet to hold all the containers and make it easy to get out what I want.  I already have some nice ideas in my head.  And yes, you might notice some other projects in this pic!

A Balancing Act

When I started Cryptic Woodworks, it was because I had been laid off and decided to do something different in my life.  Up to that point I was a computer guy by day (data visualization, analytics, reporting, that kinda thing) and a woodworker when I could find time.  So, after a few weeks rest, I headed into the shop to begin a new life.

OK, let's be serious, I knew one guy working in a garage workshop would have trouble earning enough not to starve.  But, I wanted to establish a bit of a woodworking process, a business presence and if I was lucky sell a few things.  I was also able to work out some of my designs and settle down into the types of things I want to make.

Fast forward a few months, I'm really starting to like not having a "full time" job, but I'm not making much money.  A few pieces sold, but certainly not enough.  Then I get a call from a recruiter for a nice shiny new job with benefits and everything, so I take it.

So now, my plan is to certainly keep woodworking.  While I was out of work I discovered where the shop and my own skill are lacking and the regular salary can help me fix those points.  I do have a lot less time, so that means a much more conscious decision of what I can and can't do.   The future still looks pretty nice and I have more ideas in my head than I could ever possibly make.

Stay Calm and Don't Panic

Over the years I've learned that problems are ever rarely as bad as they seem.  Indeed, going into a panic can often make a simple problem oh so much worse.

Case in point - I was putting the first coat of poly on 4 of my puzzle boxes yesterday (would have been Saturday morning).  That finish is supposed to dry in 4 hours.  Saturday night, still tacky and that was after setting a low fan on the pieces.  

Panic was starting to creep in.  But I've been here before.  Finishes often don't dry in their advertised time frames.  I waited till Sunday morning - better, but still a bit tacky.  So I put the pieces out in the morning sun for a few hours.  Brought them in around noon - still a tiny bit tacky, but definitely better.  Set the fan on them again and waited another hour or two.

Much better - plenty dry enough for the next coat.  The slow drying may cause me to do a bit of extra sanding as I likely got some dust nibs, but that's far from the end of the world.

What could I have done in a panic - tried to strip the finish off and likely damaged all the boxes.  Since they are all wood burned, glued up and oiled, I could have completely ruined them.  Instead, sit back, wait a bit and see.  Go online and read about different types of finishes, drying agents, temperature and humidity issues.  While you are doing that, the finish will likely dry and you'll be more experienced for the next time.

Why did it dry slow?  Not quite sure.  It's an older can of finish, that could be the problem.  Maybe I wiped it on a bit heavy and that slowed it down.  Maybe it was a bit too cool.  Maybe it needed more time over the existing oil (even though I know the two are compatible).  Hard to say for sure.  Maybe it was all those reasons.

Now I'll wait for the second coat to dry and try not to panic.